Akagera is located in the eastern region of Rwanda, and is today the only remaining refuge for Savannah animals in Rwanda. During the 1994 genocide against the Tutsi, the park was degraded, and as a result animal populations plummeted. In 2010, the park had as few as 5000 animals, and many native specifics populations had entirely died out. Through restorative efforts, law enforcement against poaching and reintroduction of lion and black rhino species, the park today thrives with over 12000 animals making Akagera their own. These include zebras, giraffes, antelope, lion, white and black rhino, elephant, buffalo, and hundreds of bird’s species.
African Safari’s are notably expensive endeavors, with most parks offering all inclusive offers to tourists, that include lodge stay, all meals, and game drives as part of their package. Although this is true for Akagera as well, it is not only possible, but common to see the park in other ways. Many people choose to do a day drive to Akagera from Kigali (roughly 2.5 hour drive each way) with their own self-driving vehicle or through a group tour, and purchase a day pass to the park. For those, who choose to stay overnight, such as ourselves, you can either rent or bring your own camping equipment to stay at one of the park’s several camp-grounds.
Here’s a break-down of how to travel Akagera on a budget. Including what we did, and maybe what we would choose to do in the future.
Day 1- Getting to Akagera National Park
1.Rent a Car from Kigali City (roughly $45 a day)
We used Crystal Car Hire for our rental car. We Whatsapped the car company a few days before wanting the car to book a vehicle and sent them the location of our Airbnb in the city. They dropped the car off for us outside of the Airbnb the morning we wanted it! Please note the many car rental places have day rentals rather than 24 hour rental policies and will charge you for each day you have it. Crystal Car Hire allowed us to rent for 2 days, 48 hours from the time we wanted it.
2. Drive from Kigali City to Akagera National Park (about 2.5 hours each way)
Looking for a nice place to stop along the route for a lunch and a break? Try Urugo Eco- Restaurant and Cafe Woman’s Opportunity Center in Kayonza. This social enterprise support’s woman’s jobs and they have a beautiful property to explore and gift shop. Drive slow as there are speed cameras everywhere on this route. If you’re caught speeding, it will be a $20usd ticket for each offense and your car rental company will be notified in 48 hours. You will then need to pay directly to your car rental company.
3. Arrive at Akagera National Park (South Gate) by 5:30pm.
You need to arrive at the gate while it is still daylight to be admitted into the park! This will give you enough time to pay the park entrance fees ($100/ day international, $50 African Citizen/ East African Community Resident), $10 Vehicle Fees, $25 a night per person for campsite use) and drive to one of the closest campsites. Note that you must enter through Akagera’s South Gate. It is the only option for entrance to the park. Exiting the park you may choose to go through either the South Gate, or the North Gate Options.
4. Drive to your Campsite!
Muyumbu Campsite

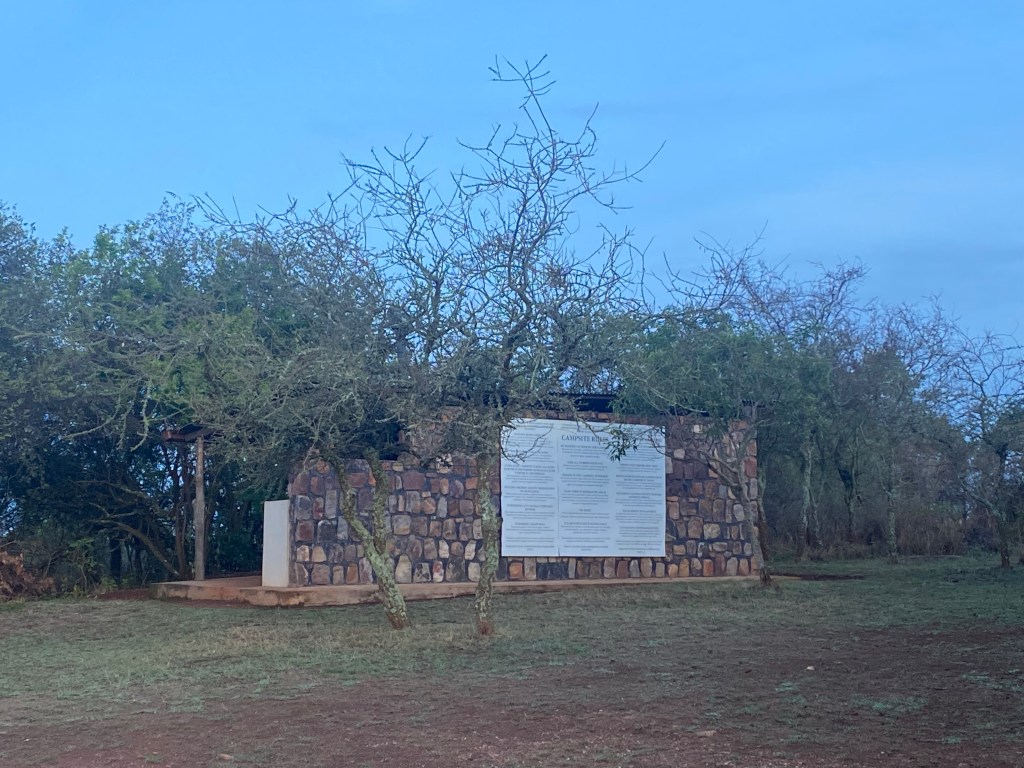
There are a two different campsites to choose from in the Southern Part of the Park. Option 1 is Muyumbu Campsite which is about a 20 minute drive from the Welcome Center and up on a hill overlooking the park. There is an electric fence around the camp ground. Option 2 is Shakani Campsite which is a little further into the park, maybe a 30 minute drive from the Welcome Center. Shakani camp site is directly on lake Shakani with a stone fence surrounding the camp ground. Since we spent a little too long taking stops on the way to the park, we chose Option 1 to be as close as we could to the Welcome Center when we woke up. Muyumbu Campsite was clean and easily accessible. We had a beautiful view in the morning of the surrounding hills and slept well knowing there was an electric fence around the property.

Day 2- Exploring Akagera National Park
1. The first thing you need to decide when choosing how to explore the park, is whether you’d like to pay for a Guide during your stay in the park. Guide’s are not expensive, costing $25 for a half day Guide and $40 for a full day Guide. Having a Guide can save you a lot of hassle as they know where animal’s like to spend their time and the in’s and out’s of the roads in the park. However, if you have a Guide, you need to remember that you are their transportation for the day. This means, that you need to either drop your Guide off back at the Welcome Center after the half day or full day trip, or you can offer to drive them into town if you are exiting the park that evening through the North Gate. From the Welcome Center to the North Gate it is about a 4 hour drive. Therefore, if you are staying in the park a second night (like we were) and want to stay in the Northern part of the park for your second night, it may not make sense to have a Guide with the amount of driving back and forth you would need to do.
Recommendations (not based on what we did)
Either a. Get a Guide but do not stay a second night. Only stay one night and drive slowly through the park and drop your Guide off in town after exiting through the North Gate. This will maximize the time you spend in the park the day you have the Guide rather than driving back and forth. Or b. Do not get a Guide and go slow through the park following a map (you can purchase at the Welcome Center) spending your time on every road and maximizing the time you spend in all parts of the park while getting to camp deeper into the park.
2. Pick your Second Campsite Based on your Above Decision
Since we did decide to get a Guide, but also wanted to stay one additional night. We decided to have a full-day Guide experience to see the park and drive back before nightfall on our driving day. Our Guide was lovely and she had a wealth of knowledge about the park, it’s history and the animal populations who live there. However, she was a little shy to get talking, and kept us mostly on the main trails we would have mapped ourselves driving on anyways.
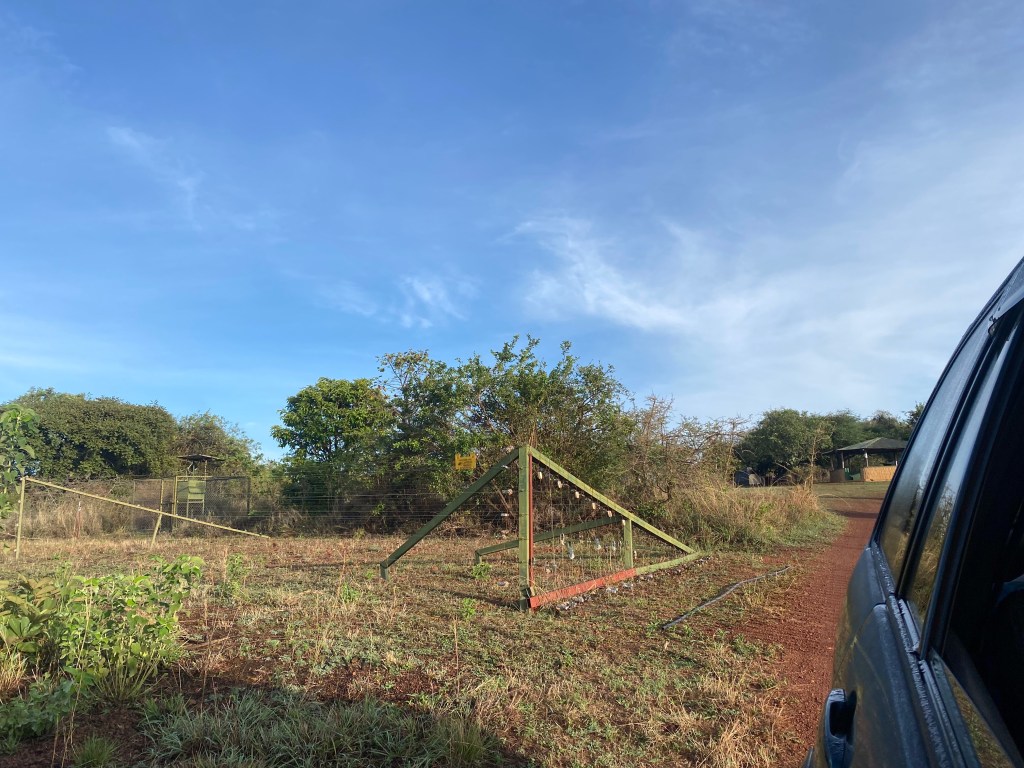
We then camped our second night at Shakani Campsite, which was a beautiful and unique experience. We camped up on the mud flats as recommended by our guide, since this is high enough and away from the water that the Hippos who live in Shakani Lake won’t venture that far. The Hippos do however come out in the middle of the night to eat the grass growing right on the shore of the lake and if you listen carefully from your tent, you can hear them munching while you’re trying to get some rest.
Shakani Campsite


In the morning, we chose to pack-up, do a little drive around the South part of the park and head back to Kigali! It was too much driving for us to attempt to drive back up through the park again to head out form the North Gate.
For those staying further North in the park your second night, the campsite in the norther part of the park is called Mutumba Campsite. According to the Akagera National Park Website, Mutumba does not have tents set-up and campers are advised to bring their own equipment. This site is located near Savannah Hills with animal viewing opportunities, and is fenced for tourist safety.
– – –
We had an amazing experience renting a car and doing our first self-drive safari! It was surreal being up close to the animals and nice to be able to slow down as we liked to take in the experience and the animals around us. Although there were logistics that would have been helpful to know to maximize our time at each part of the park, I wouldn’t trade our experience for the world. Akagera does not have as many animals as some of the major parks other places within the East Africa Community countries, and therefore you may not see every animal on your list, but the experience will be relatively easy to do, affordable, and lots of fun!

